Welcome, .NET developers! In this article, we will show you step by step how to take advantage by using WordPress with Blazor. See how you can integrate powerful Blazor components into your WordPress blog. You already know how efficient and enjoyable web development in .NET is, but now you’re faced with the challenge of integrating Blazor into a WordPress system? Don’t worry, this article shows you how easy it is!
With Blazor components, you can enrich the user experience of your WordPress website with engaging and interactive features – all in the familiar .NET environment you love. If you don’t want to or can’t develop the entire website in Blazor, you’ve come to the right place.


Table of Content
The short version: Here’s how it works
As a programmer, you want to get there quickly, so first the step-by-step guide before moving on to aspects below that might also be of interest.
The prerequisite: A Blazor component in WASM
It goes without saying that we first need a Blazor component that we want to integrate into a “normal” (non Blazor) WebSite. In this article I use my Blazor Sankey component as an example.
Important is the “WASM” part: Although it is possible to use Blazor server hosting model without any problems, in my opinion it is completely useless in most cases. If I want to use my Blazor component in an otherwise Blazor-free environment, I certainly don’t want to depend on an ASP.NET server to maintain the state for the component.
So this is solely about how to host a Blazor component developed in a Blazor WebAssembly environment as a stand-alone solution in WordPress. The WordPress part is almost incidental to this. The same technique can be used to integrate Blazor components into any environment imaginable.
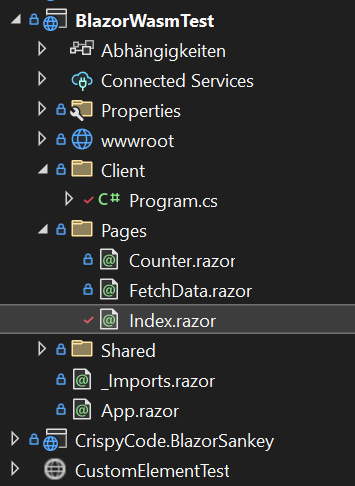
In my example, the actual component is housed in the separate project CrispyCode.BlazorSankey. You can also find the complete example on GitHub.
There, the component is used on the Index.razor page, but this is not important for the planned export as a custom element:
1. Reference CustomElements Packet
The whole thing only works since Microsoft introduced support for CustomElemenst in .NET 7. In the project that hosts the component, a reference to the nuget package Microsoft.AspNetCore.Components.CustomElements must be added:
2. Custom Component Registration
After the package has been installed, two important changes must be made in the Program.cs file:
In line 12, the component is registered via its type and an almost freely selectable name. Two important rules apply to the name:
- The name must contain a hyphen. Html elements without a hyphen are reserved for standard Html.
- The name must be in kebab case notation.
Sankey-Diagramwould not work.
Lines 6 and 7 must be commented out. Otherwise, at least an error message like this will be displayed in the console log:
Could not find any element matching selector '#app'In the worst case, even the functionality of the component is restricted. So: Get rid of the lines! They are not needed because after the export no complete Blazor app with routing and everything will run, but only the individual or all exported custom elements.
3. Publish App
The next step is to publish the project. This always refers to the Blazor WebAssembly project, even if the component is in a different project.
To publish in Visual Studio, right-click on the project in the Solution Explorer and select the Publish menu item.
If you are doing this for the first time for the project, you must create a publishing profile. You should select “Folder” as the type. We need the files on our hard disk.
After the export, the result looks something like this:
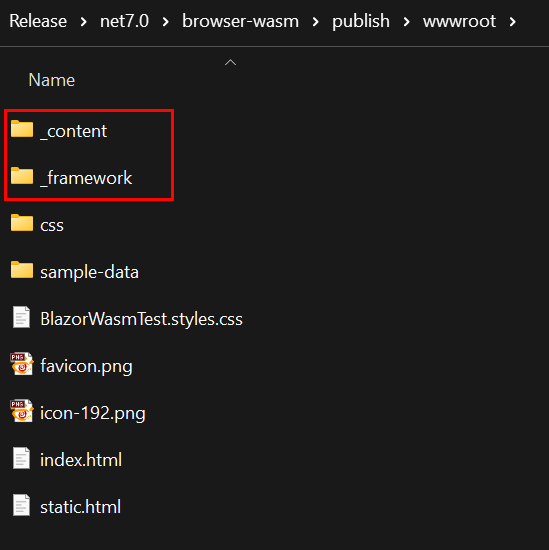
If you only need the component and possibly CSS and JavaScript bundled with it, we can concentrate on the two folders _content and _framework in the following.
4. Test
At this point, you could copy the two folders into a folder in which a static website is hosted. If you then create an index.html file there similar to the following, you can already test the result:
A couple of points are worth noting here in any case:
- The website must be provided by a web server. One cannot simply start the index.html from the file system. I use a practical extension called Live Server for Visual Studio Code. With it, you can host a directory in a web server at the touch of a button.
- The base tag in the head area must be set. This is where the path to the base directory of the application is set. In this case simply "/" because we will provide the result directly in the root directory.
- The script tag is needed to start the Blazor runtime environment. Without it, the own component remains meaningless.
- The link tag is only needed if the exported component has bundled styles. The file name must of course be adapted to the name of your component.
- The html attributes
no-data-hintandheightin this example. The kebab case rule applies here as well. The associated parameters in the Blazor component are actually defined asNoDataHintandHeight. If the component is used as a custom element, it is automatically converted to the notation shown above.
5. WordPress with Blazor
If all this works, it's just a snap to use your own component in a WordPress environment.
First of all, the base tag has to be set somehow and the JavaScript and CSS files have to be integrated. There are many ways to do this in WordPress. The easiest way is probably to use a plugin. I tried it once with the free WPCode Lite - Insert Headers and Footers.
The plugin allows you to link the required files in the menu under "Code Snippets" / "Headers and Footers":

I have included the base tag and the CSS file in the head area.

However, I had to include the Blazor WebAssembly script in the footer. This way, the component is first rendered without content and then, when the page is loaded, brought to life by the script.
When I tried to load the script in the header as well, I always got this error message:
Failed to construct 'CustomElement': The result must not have childrenThere is certainly room for improvement in this approach. The biggest disadvantage is probably that the JavaScript is loaded on every WordPress page, even if there is no Blazor component there.
After everything is registered, it lets you include the component via it's name as a normal html snippet.
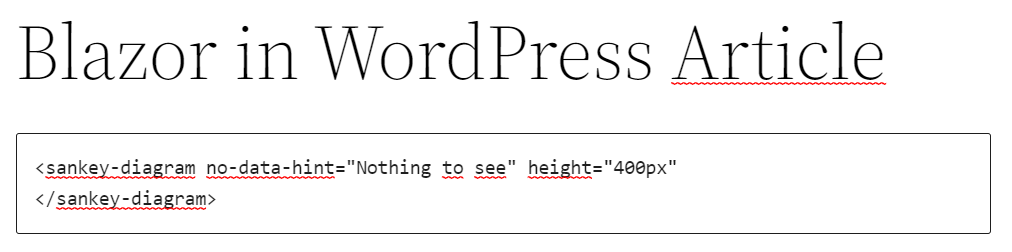
In the WordPress Block Editor, simply select Custom Html as the type and then place the component in the desired position in the article.
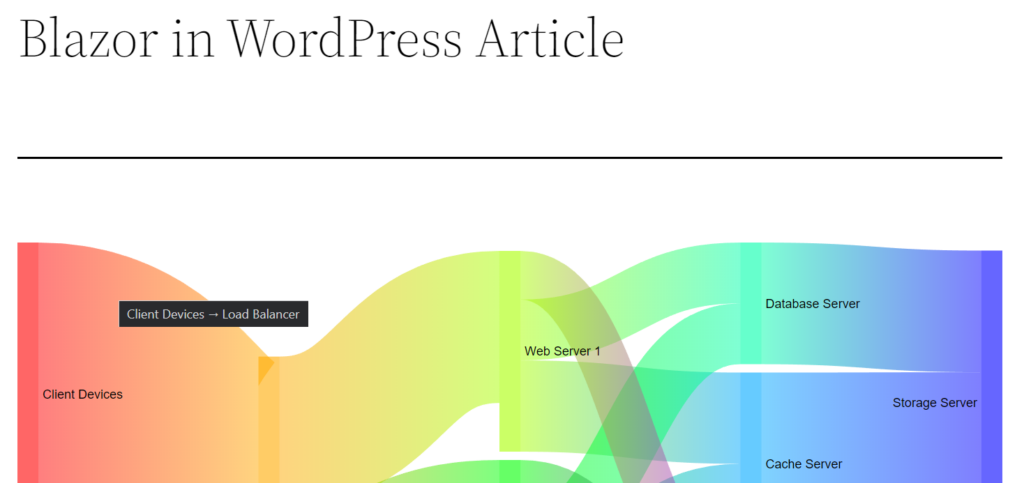
The Result
The desired result is achieved: We see a WordPress article headline and a Blazor component below it:
If you have any questions or suggestions on this topic, I'd be happy to receive a message or comment below this post.
Until then - Happy Coding!